Safely cleaning makeup brushes only takes a few minutes! Featured Answer. Dip bristles in lukewarm water and rub in with a mild soap or brush cleaner, then rinse until water is clear. Rearrange the bristle head and dry the brush flat, bristles over the edge of a counter. NEVER put the handle in water as the water can weaken the glue. Brush face weekly as many times as needed.
Oily, product, dead skin and dust stick to dirty brushes. This accumulation can cause your makeup application to become uneven, and may cause skin irritation. Safe cleaning of makeup brushes will help to keep your skin and brushes safe.
Here you will find what supplies you need, a step-by-step process, a washing schedule, drying tips and some common mistakes.
Regular Makeup Brush Cleaning is a must.
Why You Should Clean Your Makeup Brushes Regularly
Your brushes come into contact with your face daily. A sebum, foundation and dust from the environment gets collected over time. Moisture and dirt can also lead to bacterial and mold build up from damp, dirty bristles.
You can obtain the following by washing regularly:
- Even and smooth application of make-up
- Less accumulation of product in the bristles.
- Reduced risk of skin abrasion due to soiled equipment
- Long-lasting soft brushes
If you have sensitive or acne prone skin, it becomes even more important to know how to safely clean makeup brushes.
What You Need Before You Start
Do not use costly products. Gather these basics:
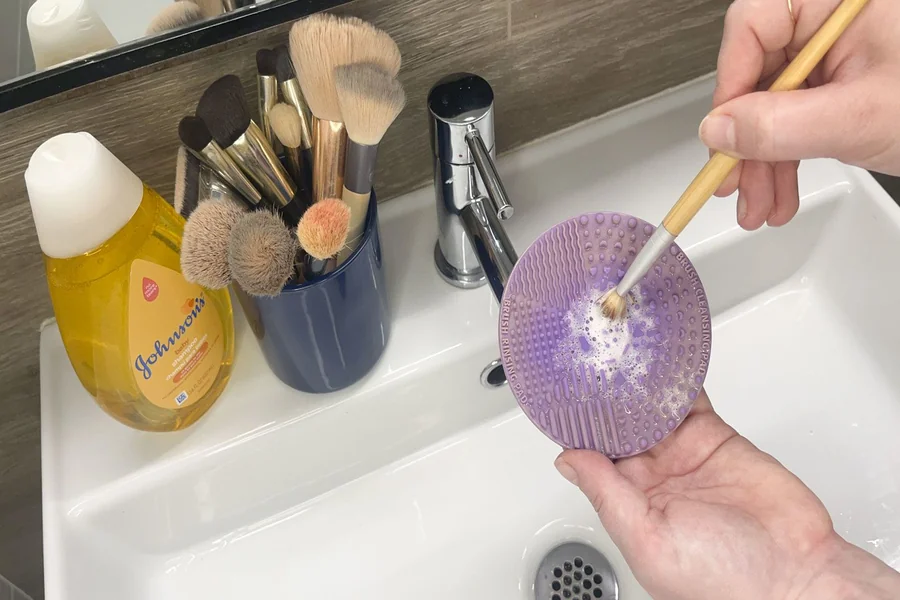
A mild soap, like baby shampoo, liquid soap or a special brush cleaner
- Lukewarm water
- A small bowl or hand size container
- Paper towels or a clean towel
- A silicone cleaning mat (optional)
- Quick sanitizing spray (isopropyl alcohol) (optional)
The word is MILD. Strong degreasers can be drying for bristles, so limit use to occasionally, if at all.
How to Clean Makeup Brushes Safely: Step-by-Step
Repeat for each brush. Use just one brush to avoid mixing!
Remove extra product. Clean the brush with a tissue or paper towel to remove excess make-up.
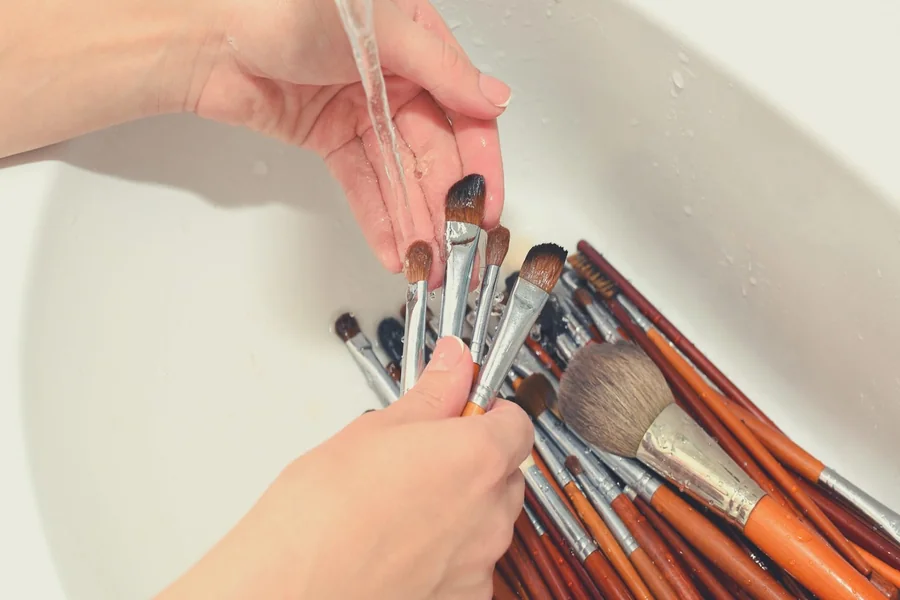
- Only wet the bristles. In the middle position, hold the brush with the bristles facing down while using running water. Avoid getting water in the ferrule (metal band holding the bristles to the handle).
- Add cleanser. Place a bit of soap on a cleaning mat or in your hand.
- Swirl gently. Rotate bristles in circular motion, moving from the tip to the bottom. Avoid rubbing or bending.
- Rinse well. Continue to rinse, brush bristles down, until water is clear and with no suds.
- Squeeze out water. Use a towel to gently press bristles. Avoid pulling or twisting.
- Reshape the head. Fold the bristles back into their original shape with hands.
- Lay it flat to dry. Hang the bristle head above the edge of a towel.
These steps are common for all kinds of brushes and are the basic steps in making safe at home makeup brush cleaning.
How Often Should You Wash Your Brushes?
The right schedule depends on what the brush touches and what product it carries. Use this table as a general guide.
| Brush Type | Suggested Frequency | Why It Matters |
| Foundation and concealer brushes | Once a week | Liquid and cream products build up quickly |
| Eyeliner and brow brushes | Once a week | Small brushes pick up oil and pigment fast |
| Lip brushes | Once a week | They touch the mouth and hold creamy product |
| Powder, blush, and bronzer brushes | Every 1–2 weeks | Dry products build up more slowly |
| Eyeshadow brushes | Every 1–2 weeks | Wipe between shades and wash on schedule |
Pair this schedule with the steps above for how to clean makeup brushes safely. Wash sooner if a brush looks dirty, smells odd, or you have had a skin or eye infection.
Safe Cleaning Tips by Brush Material
Not every brush reacts the same way to water and soap. Adjust how to clean makeup brushes safely based on the bristle type.
| Brush Material | Best Approach | Extra Tip |
| Synthetic bristles | Mild soap or brush cleanser | Handles regular washing well |
| Natural hair bristles | Gentle shampoo and cool to lukewarm water | Avoid hot water and harsh cleansers, which can dry the hair |
| Sponge-tip applicators | Gentle soap, light squeezing | Do not twist or tug, as the foam can tear |
| Brushes with glued handles | Keep water off the ferrule | Soaking can loosen the glue and cause shedding |
How to Dry Brushes Without Damage
Drying is the part that people often miss, and it’s a large part of the safety-removing makeup brushes procedure.
Water runs into the ferrule through wet bristles that are facing up. This can reduce the adhesion of the glue, and cause the bristles to separate. A bristle with wet bristles facing down may bend.
It’s easy:
- Spread the brush out on a clean towel.
- Have the bristle head dangle over the edge of the counter.
- Allow it to air dry. This may be a few hours or overnight.
Do not use a hair dryer on hot settings, as it can cause the bristles and glue to be damaged. Do not put a damp brush back into a closed bag or case. Mold and odors can result from trapped moisture.
Quick Sanitizing Between Washes
Brushes can be spot cleaned between full washings. Spray the bristles lightly with isopropyl alcohol, and wipe the bristles onto a clean tissue until the bristles transfer very little color. Allow the brush to dry before using.
Don’t spray heavily. Over time, excessive alcoholic consumption will cause the bristles to get dried out. Spot cleaning is a useful bonus, but is not a substitute for washing with soap and water.
Mistakes to Avoid When Learning How to Clean Makeup Brushes Safely
A few small habits can quietly ruin good brushes. Watch out for these:
- Soaking the whole brush. Water in the ferrule loosens the glue.
- Using very hot water. Heat can damage both the bristles and the adhesive.
- Scrubbing hard. Rough rubbing bends the bristles and causes shedding.
- Drying brushes upright. Water runs down into the handle.
- Sharing brushes. This can pass germs from one person to another.
- Skipping washes because brushes look clean. Buildup is not always easy to see.
Avoiding these errors is just as important as the washing itself.
When to Replace a Brush
Brushes won’t last forever, even with care. If you see the following symptoms, you may need to replace your brush:
- If the shave is thick and persists after being washed off
- Stiff or splayed bristles.
- A loose or wobbly handle
- An unpleasant odor that does not disappear after cleaning.
- Noticeable damage or moulding
Even the best brush cleaning routine to clean the brushes properly won’t save an old brush.
Simple Habits That Make Brush Care Easy
The best way to keep in mind the correct way to clean safely is to make it part of a routine!
- Choose a date of the week, e.g. Sunday, for washing.
- Do not wash all brushes together, wash a few at a time.
- Wipe brushes on a tissue after each use.
- Place clean, dry brushes in a dry container or case and keep upright.
- Avoid using brushes around the steamy bathroom sink and shower.
Final Thoughts
To keep your skin healthy and your make up looking great, it’s one of the easiest tips to remember how to clean makeup brushes safely. It is inexpensive, takes just a few minutes, and will make your brushes last longer.
Here are the basics of safe makeup brush cleaning: use a gentle cleanser; don’t let water get into the ferrule; rinse thoroughly in running water; dry brushes flat in an open area. Include a straightforward plan of the week, and the habit will quickly become the norm.
Begin with this week’s wash. It will be noticeable on your skin, your make up and even your brushes.
FAQs
Can I learn how to clean makeup brushes safely without a special cleanser?
Yes. Most brushes can be cleaned with baby shampoo or a mild soap for hand washing. Use one that is mild and has little or no scent, and be sure to rinse thoroughly. Do not use or apply strong degreasers regularly.
Is dish soap safe for makeup brushes?
Others add a bit of mild dish soap occasionally to help clean products up when a lot has built up. But it may be dehydrating, particularly for natural bristles. If it is to be used regularly, a mild shampoo or brush cleanser is preferable.
How long do makeup brushes take to dry?
Brushes require several hours to dry and must be large or dense brushes which require overnight drying. Spread them out in the open air and ensure they are completely dry before using or storing.
Can I use a hair dryer to dry my brushes?
It is best not to. High temperatures can cause bristles to be damaged and can weaken the glue in the ferrule. If you must move quickly, use a cool setting from a distance, and maintain the constant brush movement.
Can dirty brushes cause breakouts?
For some, dirty brushes might cause irritation or “clogged” feeling skin. Though having clean brushes is a good step, there are many other causes of breakouts. If you are having persistent skin issues, consult with a dermatologist.
Do the steps for how to clean makeup brushes safely also work for beauty sponges?
The principles are the same: rinse with mild soap, water thoroughly and squeeze out gently. Sponges retain more water, and must be completely dry between uses. They wear out faster than brushes, too, and should be replaced if they tear or crumble.