Most make-up bags have products that we don’t use that often. Worn out half-used palettes, dried out mascara, and shades that just don’t fit everyone take up space.
A Basic Make-up Kit solves this problem. It only stores products that are worn, making getting ready fast and relaxed.
Here are some simple steps for putting together a skin, wallet and lifestyle appropriate makeup kit.
What is the best way to create a minimal make-up kit?
For building a basic make-up kit, begin with what you use in your everyday make-up and select one item to wear for each area of makeup: skin, cheeks, brows, eyes and lips. Opt for multi use products such as cream blush for lips as well as for the face. Pair each hue with your skin tone and skin tone undertone. Simplicity is the key to tools. Use the kit for 2 weeks and remove unused items. The number of items in a good minimal-makeup kit is 5-8.
What is a minimal Makeup Kit?
A minimal makeup kit is a beauty product collection that is small and has been curated and edited. There is clarity over purpose for each item. There isn’t a thing there “just in case.”
It’s often similar to a capsule collection of makeup or “less is more”. The concept is still the same: less product, more use.
It’s not about the sacrifies of do without make-up. It’s the idea of holding on to what works for you and letting go of the rest.
Why Opt for a Minimal Makeup Kit?
A smaller kit; there’s a real-life advantage:
- Saves time: less steps in the morning means more time saved.
- Spends less: Purchases products and makes wise decisions.
- Leading by the hand: All in one compact pouch.
- Less waste: You complete products before they become “expired.
- Less deciding: You’ll never have to worry about what to eat.
There is a shelf life for make up, and a smaller collection will help you use it while it’s still fresh.
Make a list of your preferred look for the day
Step 1: List your look for the day.
Before you purchase an item, think about what you wear on most days. Try to recall what happened during the last week. Did you use foundation or concealer? Were you wearing eyeshadow or just mascara?
The rules for your minimal make-up kit are determined by your answers.
Here are 3 common points of departure:
- Moisture-rich: lip moisturizer, eye cream, skin moisturizer, and eye liner
- Polished every day: base, blush, brow product, mascara, lipstick
- Evening ready- smooth, shiny finish, eyeliner and a deeper lip colour.
Choose a look that you wear the most and build around it. Extras may be added later.
Step 2: Choose Your Core Products
Core products cover the basics of a finished face. Use the table below as a menu, not a rule. Skip anything you never wear.
| Product | What It Does | You Can Skip It If… |
| Skin tint or foundation | Evens out skin tone | You prefer bare skin |
| Concealer | Covers dark circles and spots | Your skin tone is already even |
| Cream blush | Adds color to cheeks | You like a pale, natural look |
| Brow pencil or gel | Shapes and fills brows | Your brows are full |
| Mascara | Defines and darkens lashes | You prefer natural lashes |
| Lipstick or tinted balm | Adds color and moisture | You only use plain lip balm |
| Setting powder (optional) | Controls shine | Your skin is dry |
Most people need five to eight of these items. This list is the heart of any minimal makeup kit.
Step 3: Select Multi-Use Products:
Multi-use products allow you to get more for your money. They are the key to developing a small yet versatile kit.
Good options include:
Cream blush: suitable for lips, cheeks, eyelids.
Tinted eye shadow: adds a flattering tint to the eyes and face
Neutral eyeshadow stick: can be used as a lid color, eyeliner smudge or light contour.
Tinted moisturizer: provides coverage and skin care feel
Look in the formula as well. Liquid or cream can be good choices for dry skin. Powders can work well with oily skin.
If you’re building a minimum make-up package, multi-use items offer you the most value for the area that they occupy.
Step 4: Match shades to your skin tone
One of the largest causes of unused make-up is wearing the wrong shade. It is better to take time to get this right.
The first step is to determine your undertone. Turn your wrist over in the light to see the veins. Warm undertones can be indicated by greenish veins. A cool one will always have blue or purple veins. If you see both, you might be a neutral.
Then select colors that are similar to your natural coloring:
- Flushed; reddened: redness of the face or complexion: flushed.
- Greenblack: a greenish-black color, close to your natural lip color, or one shade darker
- Under your eyes/eyebrows: match your face hair or one shade lighter.
Test shades on the jawline in natural light, if possible. A minimal makeup kit is easier to wear with various clothes and styles because of the different hues that are soft and neutral.
Steps: 5 Keep Your Tools Simple
A 20-piece brush set is not necessary. Cream products can be manipulated easily with your fingers.
All that is needed is a simple tool box:
- One soft brush to apply powder and blush to the face.
- A small brush angled to use concealer or brows.
- Mixing sponge for base.
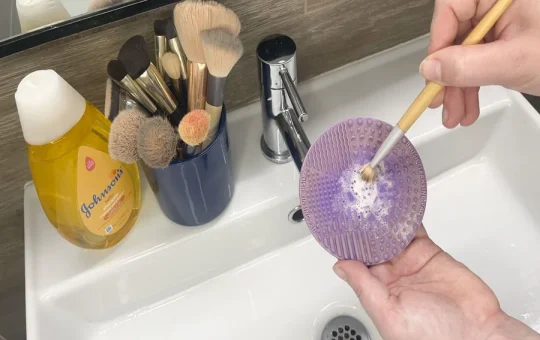
Clean up brushes and sponges frequently. Clean tools will make make-up easier and make your skin happier.
Sample Minimal Makeup Kits by Style
Use these examples as starting points. Change them to match your needs.
| Kit Style | What Is Inside | Item Count |
| Beginner | Tinted moisturizer, concealer, mascara, tinted lip balm | 4 |
| Everyday | Skin tint, concealer, cream blush, brow gel, mascara, lipstick | 6 |
| Travel | Skin tint, cream stick for cheeks and lips, mascara, brow pencil | 4 |
| Special event | Everyday kit plus eyeliner, powder, and eyeshadow stick | 9 |
These kits are guides, not rules. The best minimal makeup kit is the one you actually use.
Common Mistakes to Avoid
For many people, the first step is taking good steps and then getting lost in clutter. Be aware of the following traps:
- Purchase all at once:Purchase one item, test it, then purchase the next.
- Copying another’s kit: Skin type, tone and lifestyle vary.
- Follow the trend: Choose colors that will look well year after year.
- Not paying attention to skin: Makeup will look more comfortable on moisturized and washed skin.
To prevent products from going bad, check for the open-jar symbol on the packaging. Experts recommend changing your mascara every 3 months.
How to Maintain Your Minimal Makeup Kit
With a little care, a little kit remains a little kit. This can be achieved easily with a few practices:
- Review monthly; every 3 months. Take away all items you are not touching.
- Follow one in and one out principle. Only add a new product when the old product is used up.
- Replace items, one by one. This prevents impulse shopping.
- Keep products out of excessive heat and humidity. Some formulas can be affected by heat and humidity.
These are practices that help to keep your mini-makeup kit neat, clean, and functional.
Final Thoughts
Knowing yourself is the key to learning how to create the least complicated makeup kit. Once you know your daily routine, your complexion, your look, everything is worth it.
Start small. Select a handful of essentials, include some items that are used for more than one purpose and simplify the tools. Check on your kit regularly and remove what is not in use.
Smaller Kit = Less jams and jams, Less spending and more confidence. You dress quicker and can feel good in your clothing.
FAQs
How many items should be in a minimum makeup bag?
People usually have 5-8 products working well. For beginners, 4 or 5 are a good beginning. The right number is the number that you will use regularly.
What’s the first thing I need to purchase?
Begin with your clothing that you wear more often. That is concealer or skin tint and mascara, for many. Next add blush and lip colour.
Is a small budget enough to create a minimalist make-up bag?
Yes. Often, less is more when it comes to purchasing products. Buy multi-use products and pay a bit more for the products that you use every day, such as a base or mascara.
Does a smaller kit work for sensitive skin?
Less product, less ingredients that come into contact with your skin. Nevertheless, read the labels and test and patch new products. Consult a dermatologist for advice if you have persistent skin problems.
How to assemble a travel kit?
Select a cream or stick that treats multiple issues. Consider using a small pouch, and convenience smaller versions of items for travel rather than full-sized versions when available.
When should I replace my kit?
Check it every three months. Change only when it’s depleted, outdated or doesn’t work with your complexion and/or look.